Part 2: Software!
At last! The very long-awaited (oops) sequel to my previous post about why it’s so important to develop websites locally. In my first post I gave you the theory, and in this one I’ll give you some more practical information.
This post is going to focus on developing WordPress sites, because if you’re developing something more complicated than that, you probably already know enough about local development, do everything via command line, and don’t really need me! ;D
Running the local server
As you’ve probably already figured out, WordPress is written in PHP, which is a server-side language. This means that the website has to communicate with a server in order to display the pages, unlike a static HTML website. WordPress, like most content management systems, separates the site’s structure (which is PHP-based) from its content (which is stored in a MySQL database). The server is what brings the two together, and this is why you need a server with PHP and MySQL to run WordPress.
I personally run my local servers by using a program called MAMP. The WordPress Codex (aka your new best friend) has a good article about how to set up WordPress with MAMP. If you’re not using a Mac, you can use XAMPP for Windows, which works similarly. If the Codex is a little too dry and/or confusing, there’s a great screencast over at CSS Tricks on this very topic! Essentially, MAMP (or XAMPP or one of the other alternatives) sets up Apache, MySQL and PHP on your computer, which lets you run a local server that you can access, but that isn’t online for everyone else to see.
One drawback of the free version MAMP is that you can only have one local server running at once, and its address is always localhost:8888, which can be fairly limiting, especially if you’ve taken on multiple projects at once (story of my life). If you’re going to be developing locally a lot, I’d recommend shelling out for MAMP Pro, which lets you run an unlimited number of local servers and name them whatever you want. I use MAMP Pro, and all of my local sites are named [sitename].dev. These local URLs are really easy to remember, and way sexier than localhost:8888… am I right?
Edit! Thanks to @Wordius on Twitter for reminding me that even in regular (free) MAMP, you can have an unlimited number of sites — they’ll all just reside at http://localhost:8888/[insertsitenamehere]. I prefer having separate local domains for each installation for a variety of reasons, but it’s not entirely necessary, especially if you’re just starting out.
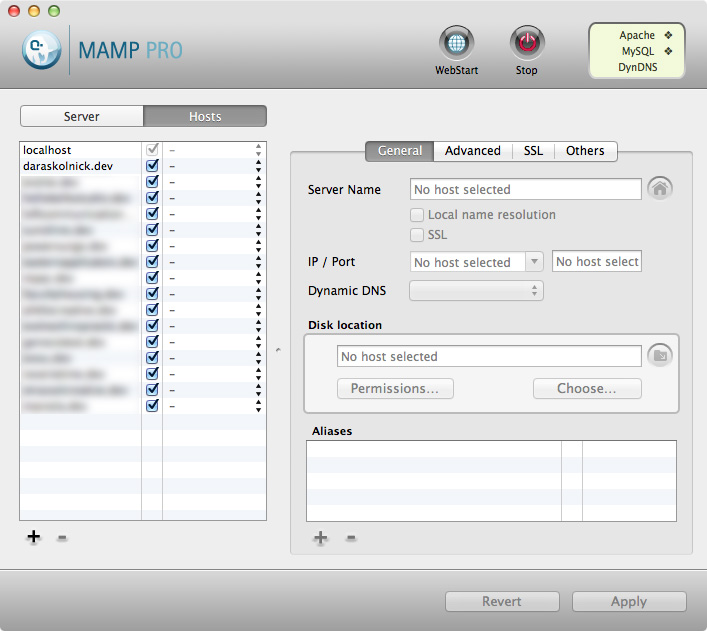
This is my MAMP screen, and to the left are the zillions of local installations I have set up right now (including a local version of my own website, where I test all of my changes first before they go live). And no, I’m not working on them all at once! I might be crazy, but not thaaaat crazy.
I’ve recently heard of another (free) program called AMPPS that provides similar functionality to MAMP. I haven’t tried it myself, but it may be worth looking into. If you’ve used it, let me know what you think!
Developing the actual site
As I mentioned in my previous post, one of the biggest advantages of coding locally is being able to use a nice text editor with syntax highlighting to do your work (as opposed to the horrors of the WordPress built-in editor), which lets you easily undo any catastrophic changes that you may or may not make. The best part about developing locally is that you’re never breaking anything that anyone else will see. It’s pretty nice when you take that pressure off yourself!
My current editor of choice is Sublime Text, which I’ve been using for about a year now, and it’s a real pleasure now that I’m used to it. I appreciate that it gets out of the way and lets me code in peace, but also has a ton of useful functionality under the hood. Before using Sublime Text I was a huge fan of Espresso, which has a really beautiful, friendly interface and some nice extra CSS features, like a built-in gradient generator. I only switched away from Espresso because I was doing a bunch of work with Sass and Haml, which Espresso didn’t support very well. You snooze, you lose, Espresso!
Leveling up your dev environment
One of the other joys of local development is being able to live reload your changes without having to manually refresh the page in the browser. Right now I’m using CodeKit for this purpose (as well as for using Sass, which is so awesome and useful and time-saving that it deserves its own post). Once you get used to seeing your changes happen in the browser without having to refresh, you can never really go back. I have a nice, big display, so I often have my code editor open on one side of my screen and the browser on the other, like so:
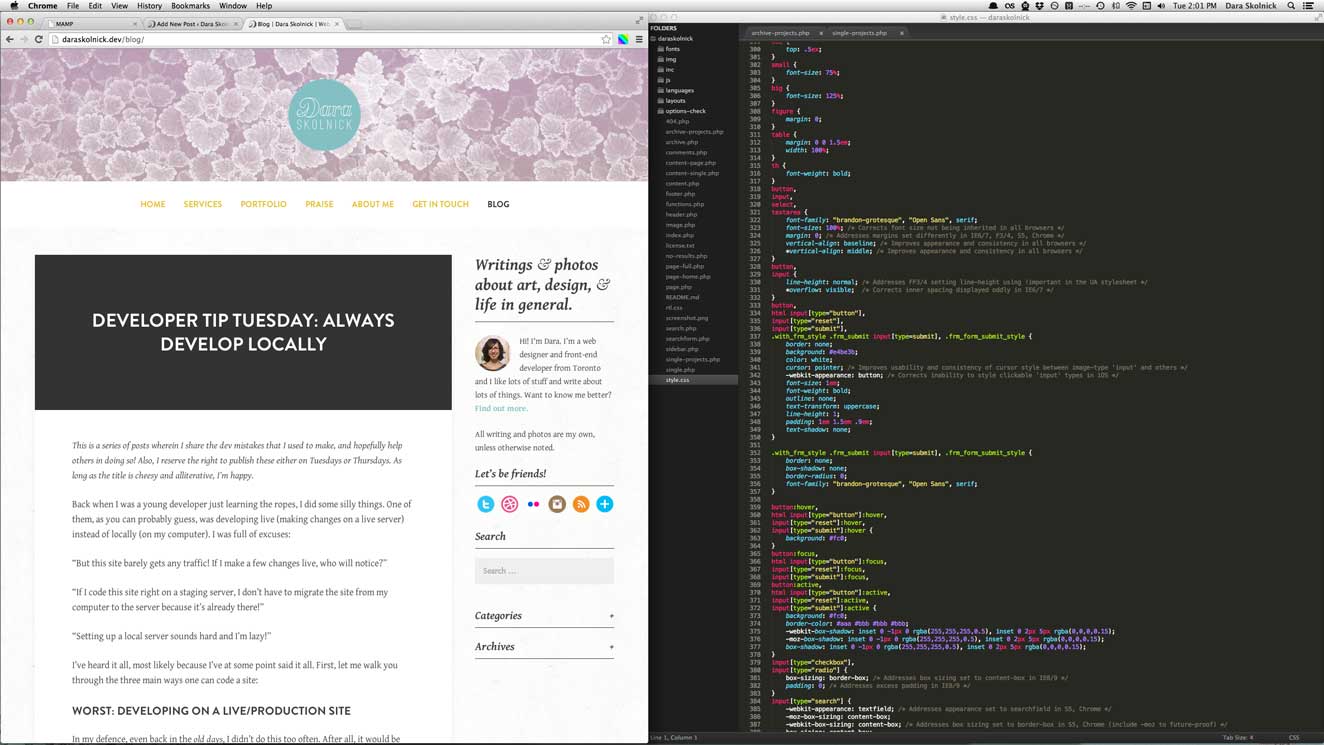
This scaled-down image doesn’t convey the majestic nature of having a 27″ display. What is this, a display for ants?
Adding your WordPress project to CodeKit is super easy. With your CodeKit window open, click on the plus sign in the bottom left hand corner, and click “Add Project…” and find your WordPress theme directory (the one inside /wp-content/themes/). Open the directory, and now CodeKit is monitoring your work and will live-reload all of your changes (as well as run CSS pre-processors if you choose, minify your JavaScript, optimize your images, and all sorts of other stuff). Easy!

Like so!
Okay, that’s cool, but now how do I get my local site on a real server?
Glad you asked! Since this post is nearly 1000 words at this point (!), it’s probably best to save that for another time instead of putting you to sleep by continuing this epic saga. In the meantime, I’ll refer you to another very helpful screencast at CSS Tricks that will walk you through this process. What this video shows is basically what I do (though I think I do a couple of things more efficiently) so definitely take a look and see if that helps you.
Till next time!